4. Edit LED schedule .csv
Contents
4. Edit LED schedule .csv#
One of the most powerful features of MoonShineP is that the user can create any light scenario by editing the
LED_schedule_moon.csvorLED_schedule_sun.csv.While MoonShineR is optimized for recreating realistic illuminance (by running the
LED_schedule_moon.csvorLED_schedule_sun.csvdirectly from MoonShineR: Schedulers), we expect that many experiments utilizing MoonShineP will require a manipulated light regime (e.g., remove a full moon night from the lunar cycle) or a purposefully standardized regime (e.g., same sunrise/set times every day).Note
MoonShineP works by finding a matching date/time in the schedule
.csvto the current Raspberry Pi system time. This makes re-creating the moonlight schedule at the current moment straightforward; the user simply needs to enter the current time in MoonShineR: Schedulers to generate such a schedule.csv. However, this means that if the user wishes to re-create a moonlight cycle in the past or future, the schedule.csvis required to have LED intensity values predicted for the desired time in the past of future, but a datetime that matches the current system time. Instructions for doing so are probided below, in creating a simulation for a past or future date.
Creating customized schedules#
To create a customized schedule
.csv, the user can either modify an existing MoonShineR generated schedule.csvusing Excel (See Option 1, below). Alternatively, the user can create the customized schedule manually, using the provided Excel spreadsheet template (manual_scheduler.xlsx) (See Option 2, below). The user can also combine both approaches to a create a customizedLED_schedule .csv, because the methods are better suited for different scenarios.MoonShineP can run any schedule
.csvwhen the following conditions are met:The .csv file contains the nine required columns, as described below (extra columns with other headers can be present, but will be ignored):
The first column is ‘datetime’ in YYYY-MM-DD hh:mm:ss format (see Fig. 26)(and the user must also make sure that the schedule starts before the intended launch time, see 8. MoonShineP: Launch procedure).
The next eight columns are the For the eight RGBW LED values, i.e., ‘crude’ and ‘fine’ settings for each of white, read green, and blue. These are labeled ‘crudewhite’, ‘wfine’, ‘crudered’, ‘rfine’, ‘crudegreen’, ‘gfine’, ‘crudeblue’, ‘bfine’ (see Fig. 7). The user must ensure that:
Crude intensity values ranges from 0-255 (LED intensity level).
Fine intensity values ranges from 0 to the total number of LEDs in the array.
The schedule
.csvis named eitherLED_schedule_moon.csvorLED_schedule_sun.csv
Option 1: Modify an existing LED_schedule .csv#
This method is suited for simple modifications such as setting a period of darkness,repeating certain part of the existing schedule, or re-creating a moonlight cycle in the past or future.
To create a novel light regime, see Option 2.
Steps#
First, generate a “blueprint” schedule
.csvfor a chosen location and time period, with 1 minute intervals.Then use Excel to edit the ‘datetime’ and/or the LED intensity values (crude and fine) in the schedule
.csv.
Below are examples of how the schedule .csv can be edited:
Turning off light for certain period:#
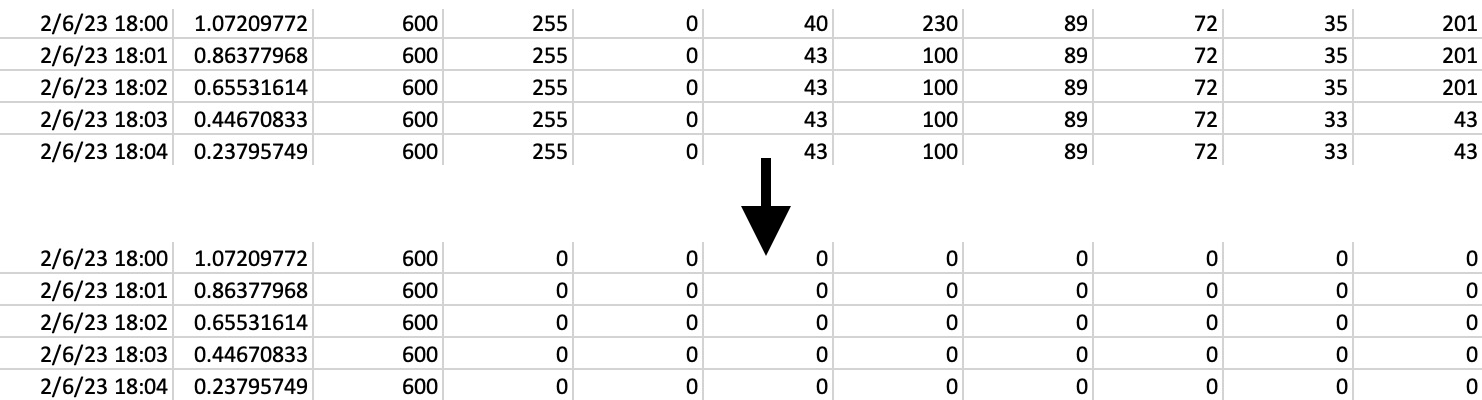
Fig. 24 A dark period can be simply inserted simply by replacing the LED values with zero.#
Copy and paste the LED intensity:#
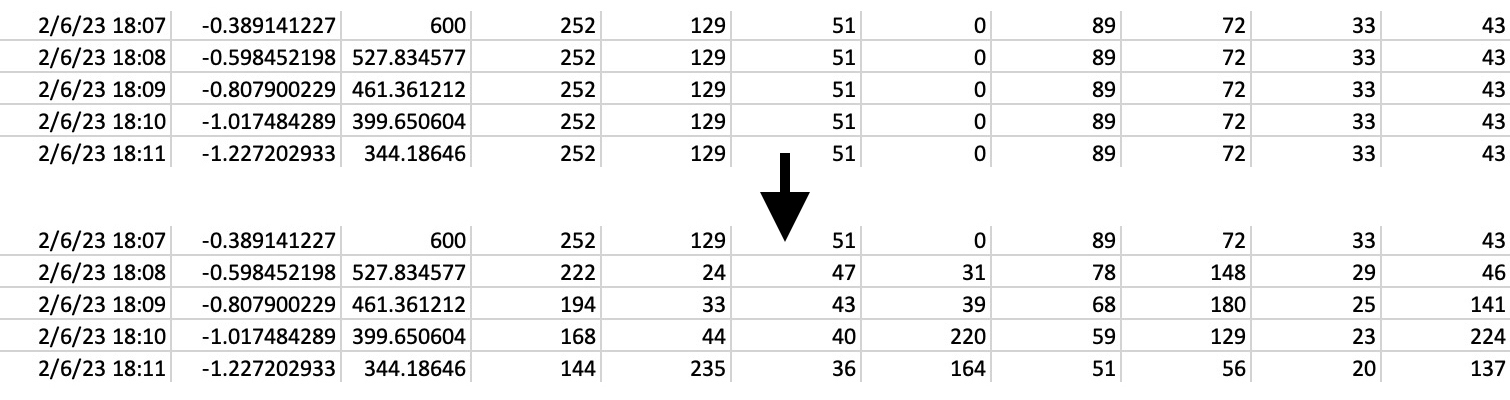
Fig. 25 Copy and paste the LED intensity from one row to other rows at different times. For example, the user can copy an entire night of LED intensity progression during a full moon and paste it into another night.#
To re-create a moonlight cycle in the past or future:#
Generate a schedule
.csvin MoonShineR: Schedulers with the desired settings and with a start time in the past or future.The generated schedule
.csvwill have the correct LED intensity values but a date/time that can not be launched immediately as the date is not current.Therefore, the user would replace the starting date/time of the re-created illumination schedule (from a past or future date) with the current date/time for the moonlight re-creation. To do so:
Delete all the original entries in the ‘datetime’ column except for the first two rows.
Edit the entries in the first two rows with the new date/time, so that the first row is the desired start time and the second row is the first row’s time + 1 minute.
Select the first two date/time, and use the Excel ‘fill handle’ to copy a new sequence of date/time values, at 1 min intervals, through until the last row of the simulation.
Make sure DST is not applied to any date-time values in the edited column.
See the next section to save the date/time in the correct format.
Problem with Excel datetime#
When opening a newly created schedule
.csvin R, or with a text editor (e.g. Microsoft Notepad/Notepad++ in Microsoft Windows or TextEdit in Mac), the ‘datetime’ column is presented in the following correct format:YYYY-MM-DD hh:mm:ss
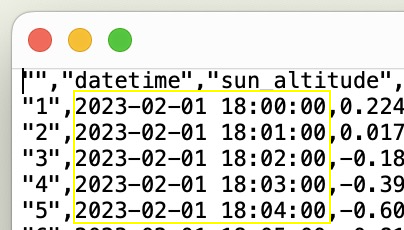
Fig. 26 The correct date/time format when opened with a text editor.#
However, when the same schedule
.csvis opened in Excel, the date/time will automatically reformat to the Excel’s default format (this default format may depends on the user’s computer’s country setting). If the user then saves the schedule.csvin Excel, the date/time will be saved in an erroneous format that MoonShineP will not recognize.
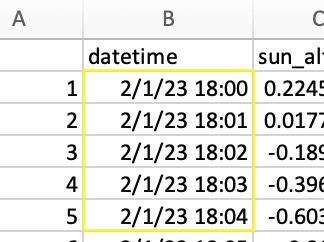
Fig. 27 The wrong date/time format is displayed when schedule .csv is opened in Excel. The order of year, month, and day is incorrect, the number of digits is incorrect, and the seconds are missing.#
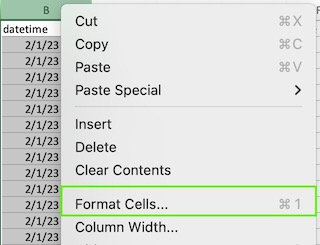
To remedy this problem, the date/time format needs to be specified every time the user opens and then saves schedule
.csvin Excel. To do so, the user must follow the following steps.Right click at the ‘datetime’ column header, and click Format Cells…:
Click Custom, and paste YYYY-MM-DD hh:mm:ss in Type:. Then click OK.

Now the date/time is correct, and the schedule
.csvis ready for saving.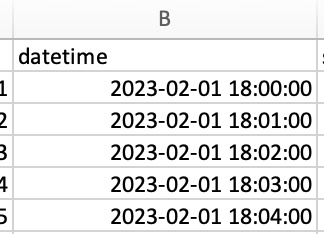
This problem will reappear if the corrected schedule
.csvfile is then reopened in Excel. If the intention is to edit and re-save theLED_schedule.csvfile in Excel, this date/time correction procedure must be repeated every time it is opened in Excel.
Option 2: Create LED schedule manually using manual_scheduler.xlsx#
This method allows the assembly of a fully customized LED schedule. The
manual_scheduler.xlsxfile (download in Download files) functions as a template to convert a list of desired illuminances into LED intensity values. Using this template, the user can re-create any novel illuminance schedule as desired.
Steps#
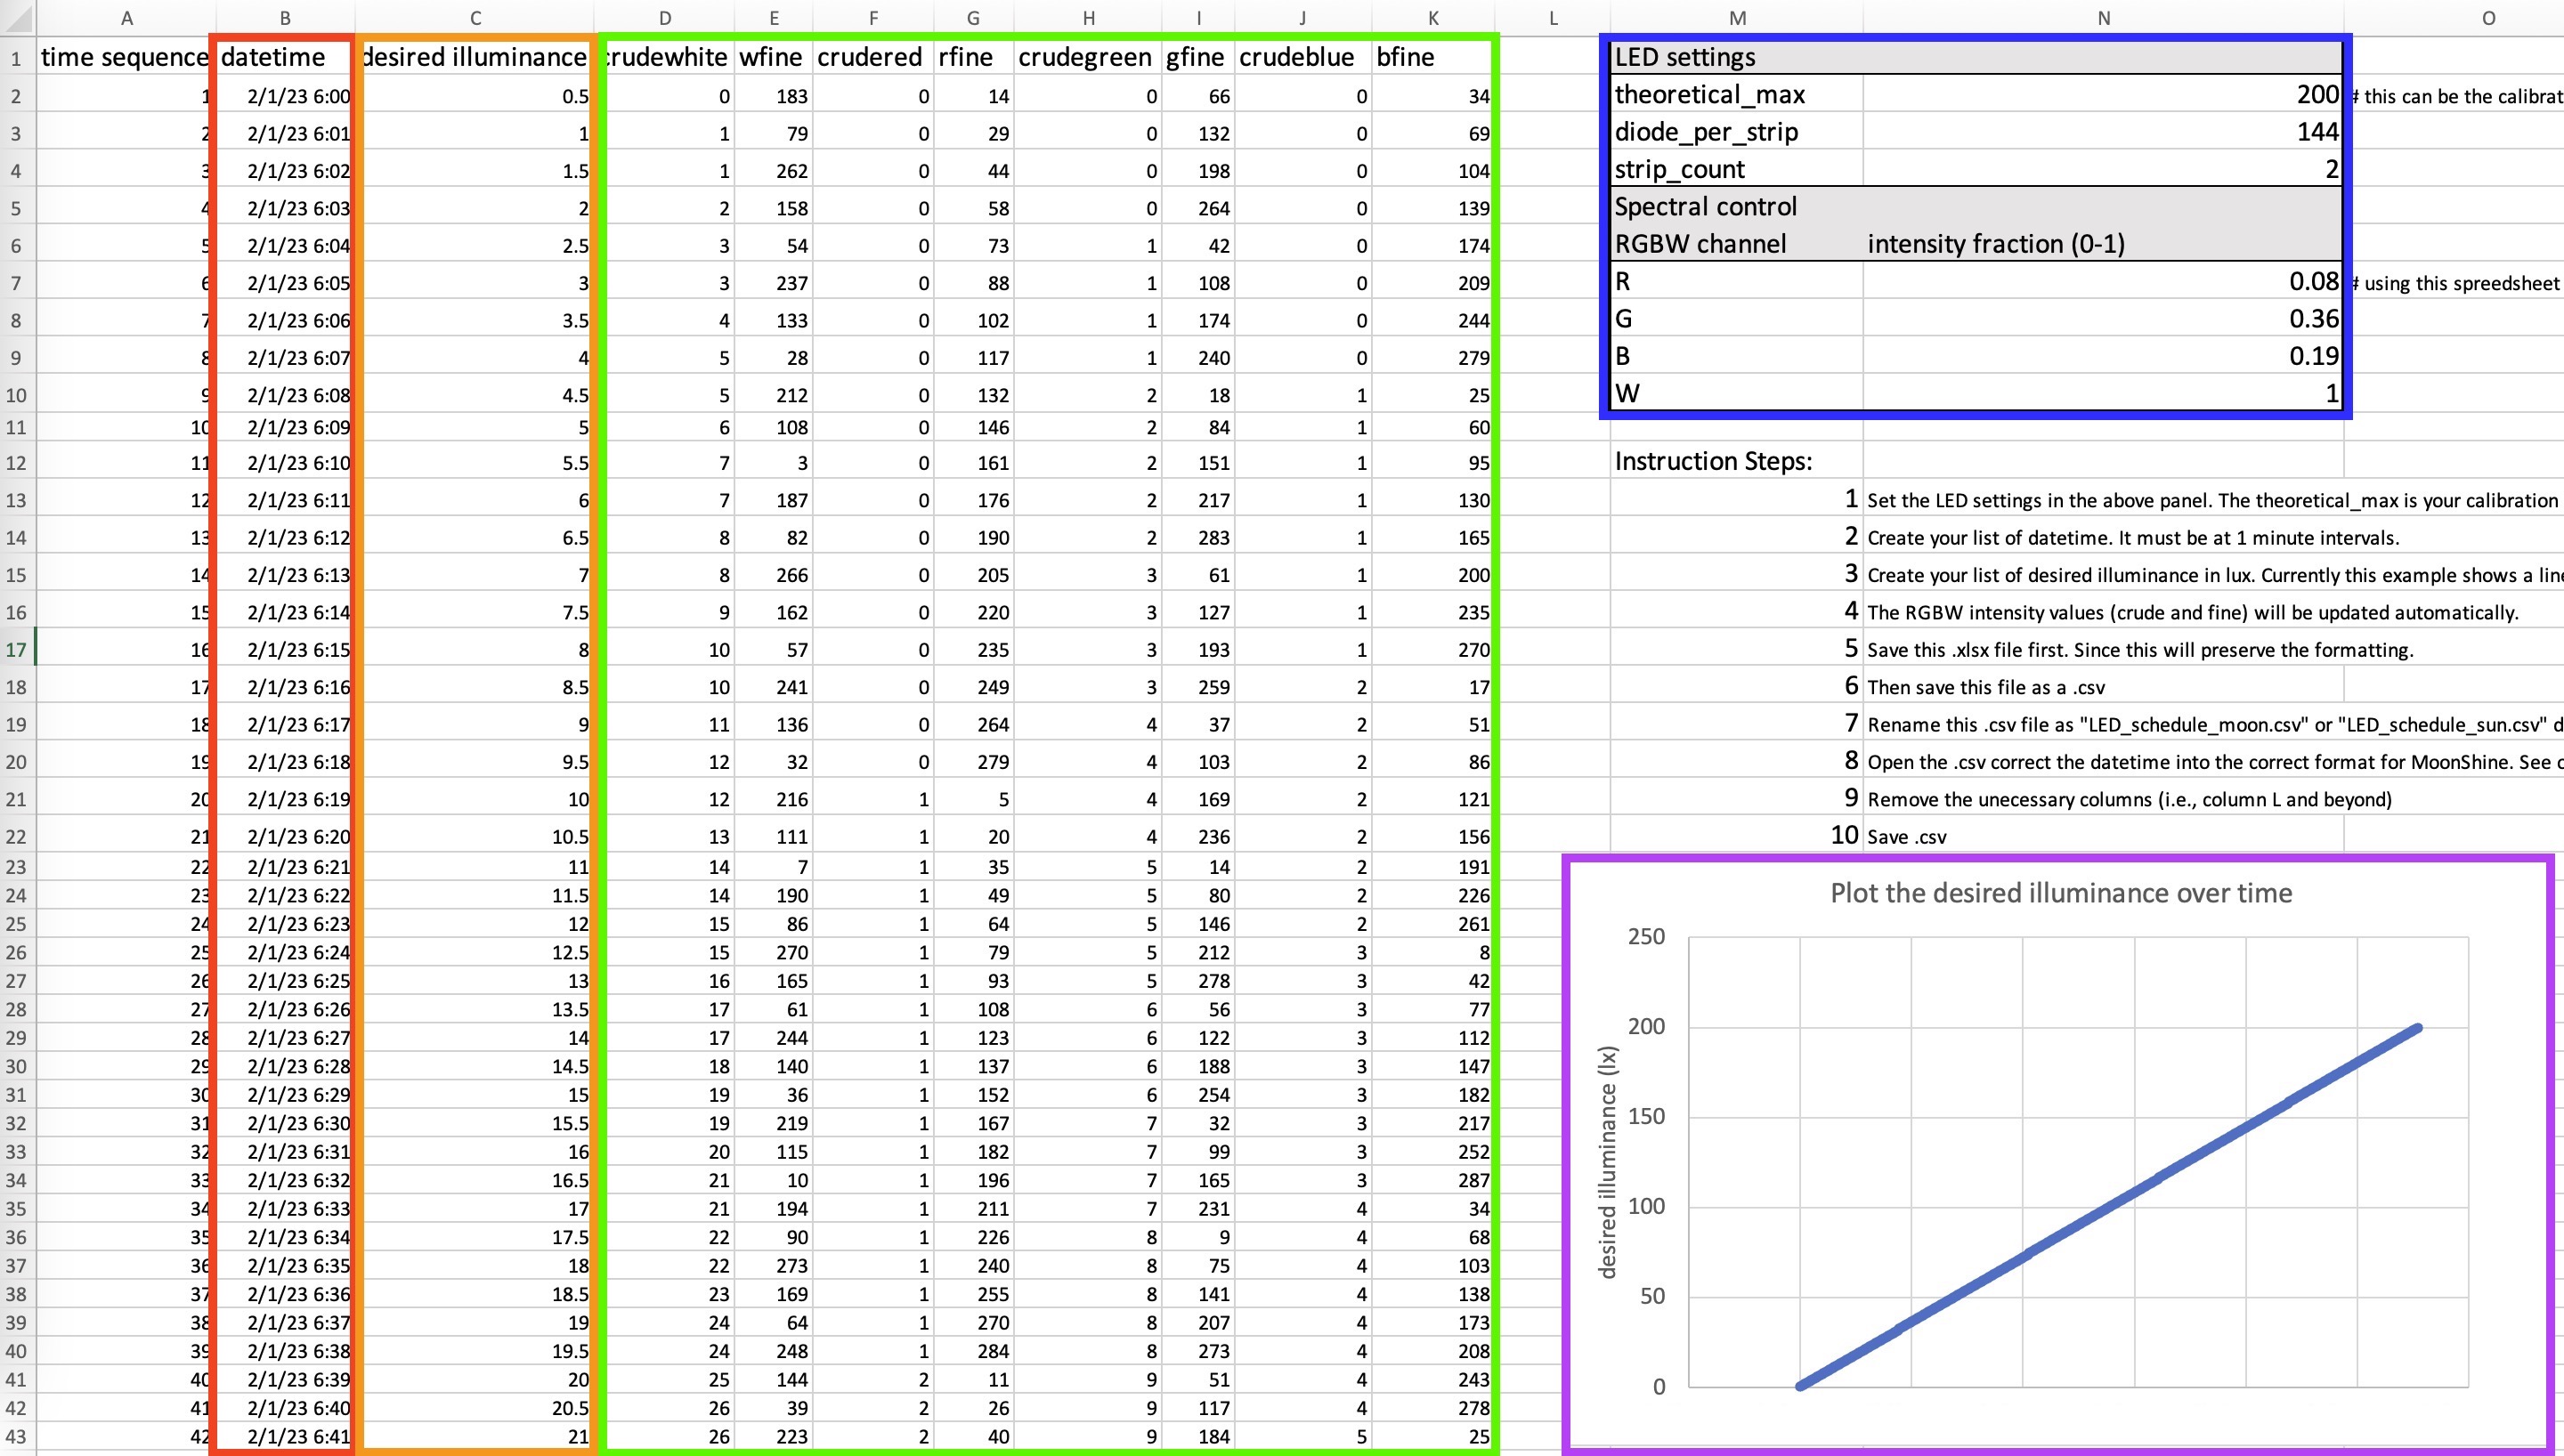
Fig. 28 The layout of manual_scheduler.xlsx. ‘datetime’ (red box), ‘desired illuminance’ (orange box), RGBW LED intensity values (green), LED settings (blue), and preview plot (purple). In this example, the desired illuminance list is a linear function, increasing 0.5 lx every minute until it reaches 200 lx in 6 hours and 40 minutes.#
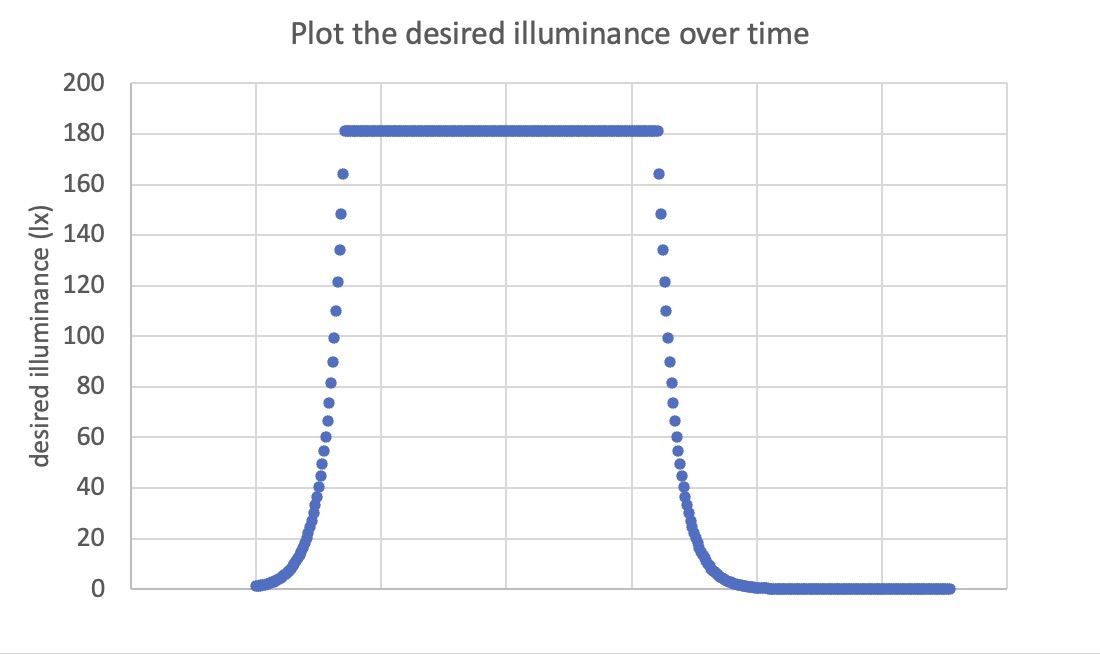
Fig. 29 A second example of a manual schedule showing only the preview plot. The desired illuminance list consists of a natural exponent function at the start and end of the sequence, and a plateau of illuminance in the center. The LED intensity values are calculated automatically based on the desired illuminance list. MoonShineP will convert these values into accurate illumination in the room.#
Set the LED settings in the upper right panel (Fig. 28). The theoretical_max is the calibration illuminance, see 7. MoonShineP: Calibration.
Fill in the ‘datetime’ column. This must be at 1 minute intervals.
Create the list of desired illuminances in lux. See (Fig. 28) for an example.
The LED intensity values (crude and fine) will be updated automatically.
Save this
.xlsxfile first because this will preserve the formatting (graph and equations).Then save this file as a separate
.csvfile, using “save as”.Rename this newly created
.csvfile toLED_schedule_moon.csvorLED_schedule_sun.csvdepending on what the user is re-creating in MoonShineP.Open this
.csvfile in Excel to correct the ‘datetime’ into the correct format for MoonShineP, as described above.Remove the unnecessary columns (i.e., column L and beyond).
Save changes.
The user can run this finalized
.csvwith MoonShineP, or append it to an existing schedule.csvby matching the corresponding columns.